Jeśli szukasz przepisu na wyjątkową, elegancką szarlotkę, która zachwyci każde podniebienie, to trafiłeś idealnie!
Czym się różni szarlotka od jabłecznika? Szarlotka to ciasto z jabłkami na kruchym spodzie z kruszonką u góry, jabłecznik to ciasto ucierane z kawałkami jabłek.
Mój przepis na szarlotkę to wypiek, który z powodzeniem mógłby zagościć w menu wykwintnej restauracji. Dziś podzielę się z Wami przepisem, który z pewnością nie jest banalny, lecz taki, który zachwyci nawet najbardziej wymagających gości. Wykorzystując świeże jabłka, delikatne ciasto kruche i aromatyczne dodatki, stworzymy deser na miarę najlepszych cukierni!
Składniki na ciasto kruche:
- 100 g masła
- 100 g margaryny
- 2 żółtka
- 300 g mąki 450
- 100 g cukru
Składniki na masę jabłeczną:
- 4-5 średniej wielkości jabłek (u mnie ligol i gala)
- łyżka cukru
- łyżka miodu
- pół opakowania cynamonu
- garść malin (według własnych preferencji; można pominąć :))
- dwie łyżki dżemu (możecie dodać jaki chcecie; porzeczkowy, wiśniowy, truskawkowy itp., ja miałam akurat figowy)
- sok z jednej pomarańczy
Krok 1: Przygotowanie ciasta kruchego
- W mikserze łączymy masło, margarynę, żółtka, mąkę i cukier. Całość miksujemy, aż składniki się połączą. (ten etap można wykonać również ręcznie, zagniatając po prostu ciasto).
- Przygotowujemy rant do tarty o średnicy 24 cm, zabezpieczając spód papierem do pieczenia. Przepis sprawdzi się również doskonale na formach mniejszych, o średnicy od 21 cm.
- Gotowe ciasto lekko zagniatamy, kroimy na 6 części i od razu układamy na przygotowanym spodzie. (Tutaj powinna Ci zostać 1/4 ciasta, która później posłuży jako kruszonką)
- Resztę ciasta, która zostanie odkładamy na później do lodówki, zabezpieczając folią spożywczą.
- Ciasto w rancie formujemy ręką, dokładnie przyciskając do spodu całą dłonią oraz przyciskamy boki tarty za pomocą kciuka. Nadmiar wystający poza rant odkrajamy nożem i wkładamy do lodówki wraz z poprzednią częścią, która została (patrz podpunkt 4).
- Uformowane ciasto kruche nakłuwamy widelcem i chłodzimy w lodówce.
Krok 2: Przygotowanie nadzienia jabłkowego
- W czasie, gdy ciasto chłodzi się w lodówce, rozgrzewamy piekarnik do 180 stopni tryb termoobieg .
- Obieramy jabłka.
- Od obranego jabłka odkrajamy po dwie strony, resztę jabłka odstawiamy. Strony kroimy na drobną kostkę i wrzucamy na patelnię.
- Resztę jabłka ścieramy na tarce o dużych oczkach i dodajemy do patelni.
- Podgrzewamy jabłka na patelni, dodając łyżkę cukru, łyżkę miodu, pół opakowania cynamonu, garść malin oraz dżem.
- Na koniec dodajemy sok z jednej pomarańczy i dusimy przez chwilę, aż smaki się połączą.
- Gotową masę jabłeczną odsączamy z nadmiaru soku na sicie.
Wskazówka: Nadmiar soku z jabłek można później wykorzystać do przygotowania pysznej lemoniady, herbaty lub wody – nic się nie zmarnuje!
Krok 3: Pieczenie i dekoracja
- Wyjmujemy tartę z lodówki (tak-nasz spód, jeszcze bez jabłek :)) i pieczemy w piekarniku przez około 15-20 minut do zarumienienia ciasta w 180 stopniach tryb termoobieg.
- Po tym czasie wyjmujemy gotowy spód z piekarnika i posypujemy bułką tartą, aby zapobiec zmięknięciu ciasta pod wpływem wilgoci z jabłek. (nie wyłączaj piekarnika! Zaraz gotowe ciasto włożysz z powrotem :))
- Nakładamy równomiernie przygotowaną wcześniej masę jabłeczną.
- Pozostałą część ciasta kruchego, które było w lodówce ścieramy na tarce i posypujemy na wierzch ciasta.
- Wkładamy tartę do piekarnika na kolejne 25-30 minut (w tej samej temperaturze i ustawieniu jak poprzednio), aż ciasto nabierze złocistego koloru.
- Gotowe!
Bon Apetit!
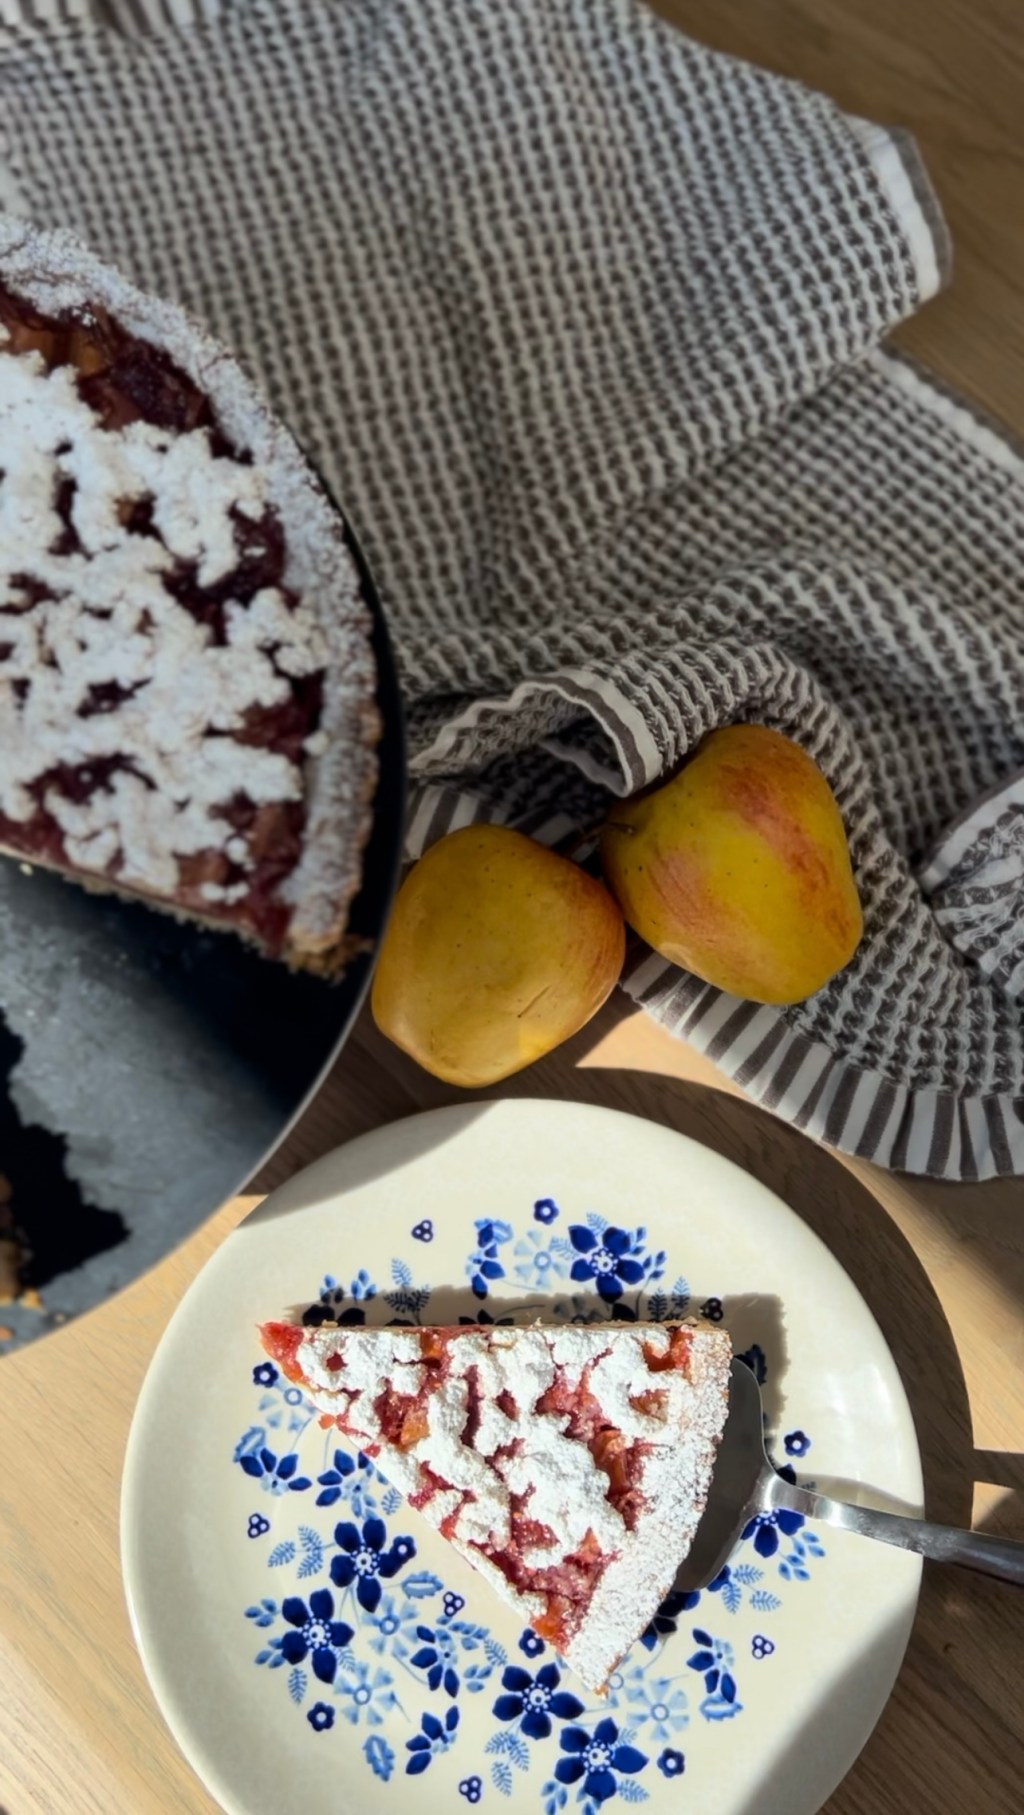
Twoja szarlotka jest już gotowa! Wyjmij ją z piekarnika, pozwól ostygnąć i przed podaniem posyp cukrem pudrem.
Wskazówka: Poczekaj aż szarlotka wystygnie następnie za pomocą noża lekko oddziel ciasto od rantu, a tarta wyjdzie gładko 🙂
Podanie: Gotową szarlotkę można podawać z bitą śmietaną i lodami waniliowymi – efekt będzie powalający! Delektuj się smakiem tego klasycznego wypieku w nowej, eleganckiej odsłonie. Smacznego!
Step-by-Step Guide to Making the Perfect Apple Pie
If you’re looking for a recipe for a unique, elegant apple pie that will delight every taste bud, you’ve come to the right place! How does an apple pie differ from an apple cake? An apple pie is made with apples on a shortcrust base with a crumble topping, while an apple cake is a butter cake with pieces of apples. My apple pie recipe could easily feature in a high-end restaurant menu. Today, I’ll share with you a recipe that is far from ordinary, one that will impress even the most demanding guests. Using fresh apples, delicate shortcrust pastry, and aromatic toppings, we’ll create a dessert that could rival the best patisseries!
Ingredients for the shortcrust pastry:
- 100 g butter
- 100 g margarine
- 2 egg yolks
- 300 g flour 450 type
- 100 g sugar
Ingredients for the apple filling:
- 4-5 medium apples (I used Ligol and Gala)
- 1 tablespoon sugar
- 1 tablespoon honey
- Half a pack of cinnamon
- A handful of raspberries (optional)
- 2 tablespoons jam (any type; I used fig)
- Juice of one orange
Step 1: Preparing the Shortcrust Pastry
- In a mixer, combine butter, margarine, egg yolks, flour, and sugar. Mix until the ingredients are well combined. (You can also do this by hand, simply kneading the dough).
- Prepare the tart ring with a 24 cm diameter, securing the base with baking paper. This recipe will also work perfectly for smaller tart tins, from 21 cm in diameter.
- Gently knead the dough, cut it into 6 pieces, and immediately place them on the prepared base.
- Set aside the remaining dough in the fridge, wrapped in cling film.
- Press the dough into the base and sides of the tart tin with your fingers, trimming any excess with a knife and chilling in the fridge along with the previously reserved dough (see step 4).
- Prick the pastry with a fork and return it to the fridge to cool.
Step 2: Preparing the Apple Filling
- While the pastry is chilling, preheat the oven to 180 degrees with a convection setting.
- Peel the apples.
- Cut two sides from each peeled apple and set aside the rest. Dice the sides finely and place them in a pan.
- Grate the remaining apples on a coarse grater and add them to the pan.
- Heat the apples on the pan, adding a tablespoon of sugar, a tablespoon of honey, half a pack of cinnamon, a handful of raspberries, and jam.
- Finally, add the juice of one orange and simmer for a while until the flavors meld.
- Drain the apple mixture to remove excess juice on a sieve. Tip: The excess juice from the apples can later be used to prepare a delicious lemonade, tea, or water – nothing goes to waste!
Step 3: Baking and Decoration
- Take the tart out of the fridge and bake it in the oven for about 15-20 minutes until the pastry is golden brown at 180 degrees with a convection setting.
- After that, remove the tart base from the oven and sprinkle it with breadcrumbs to prevent it from getting soggy due to the apple moisture. (Do not turn off the oven! You’ll be putting the finished pie back in soon.)
- Evenly spread the prepared apple filling.
- Grate the remaining shortcrust pastry, which was in the fridge, and sprinkle it over the top of the pie.
- Place the tart back in the oven for another 25-30 minutes (at the same temperature and setting as before) until the pastry turns golden. It’s ready!
Bon apetit!
Your apple pie is now ready! Take it out of the oven, let it cool, and before serving, sprinkle it with powdered sugar.
Tip: Wait until the apple pie cools down, then gently separate the pie from the ring with a knife for a smooth release.
Serving: The finished apple pie can be served with whipped cream and vanilla ice cream – it will be absolutely stunning! Enjoy the taste of this classic dessert in a new, elegant version. Enjoy!

Dodaj komentarz